
A little something extra to bring your paws up a notch!
Paw Pockets are perfect for storing squeakers (which often leave hard spots in pawpads if sewn in), money, and hard things like coins for those who use their paws in play and like a harder smack.
This isn’t a pattern: you’ll still need your own paw pattern (I like Wittlestudio’s Puffy Paws) and to script your own pocket pieces. Paw pockets are best in big, slappy paws: smaller paws, like flat paws or tight fitting paws, just don’t have the space for it. I also don’t recommend putting a pocket, or at least a zipper pocket, in pieces used for dance competitions (the sweat and rubbing will give you a rash!).
First off: What is a welt?
A welt is an opening in fabric, usually used for pockets, buttonholes, and technically those cute keyhole sweaters. They’re usually square. You make it by pressing right sides of the material together, sewing a square (or two equal lines), cutting the center out, and flipping.
If you’re having trouble following this tutorial, try looking up welt zipper pockets. That’s how I learned how to do this.
Recommended Tools:
Sewing machine: unless you are a really, really good handsewer.
Chalk/fabric pen: for marking out your welt.
Pins: pins rather than clips for sewing the zipper into place, but clips are usable for the rest.
Serger: very optional, but I like it for finishing the edges of my pocket. Some sewing machines have an overlock stitch! Or you could zig zag the edges. Or just finish them with a hem. Up to you!
You’ll need:
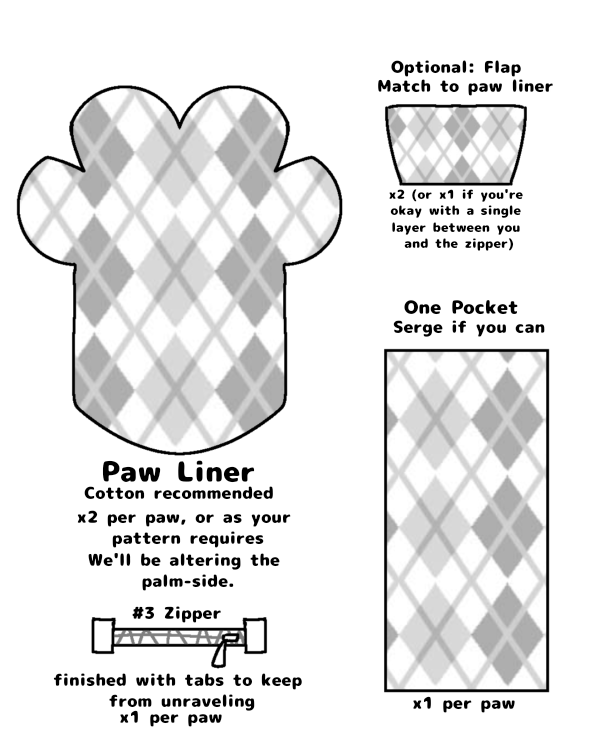
Paw Liner: I recommend cotton, but any non-stretch fabric would work. Your pattern will usually include a piece for this. Some come with one per paw, but I usually do two because faux fur is a horrid texture on the inside. We’re altering the palm side.
Zipper: I use #3 zippers with as small a pull as I can find. The ends are finished in tabs, so they won’t fray as quickly. This will be a bit longer than your welt opening. You could forgo these, but I find them the most secure. Velcro is also a good option!
Pocket: I recommend cotton again. You’ll only see a tiny bit of it when you’re done, so don’t fret on it matching. I usually make these a little less wide than the paw’s wrist and about as long as the whole piece. You’ll be folding it over in the end: if you want it big enough to fit your phone, be sure to mind that!
Optional Flap: I try to put these in when I remember, as the zipper can be irritating to sensitive folks. These would be integral to a velcro opening.
To Make:
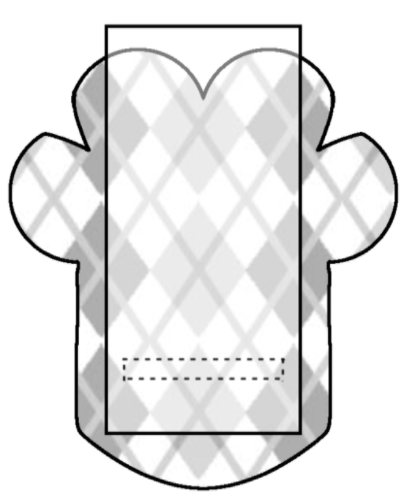
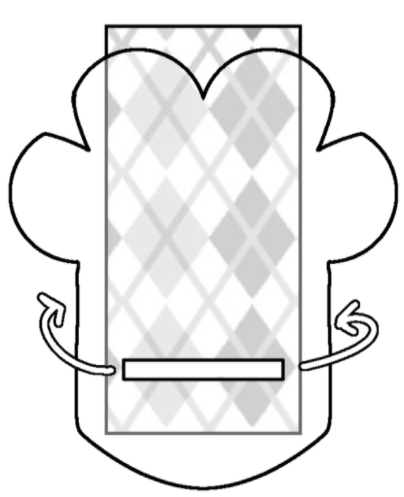
Place right sides (the pretty sides) of one paw lining piece and the pocket together. You want the main length going TOWARDS the fingers. Mark and sew about an inch (or half an inch if you’re good with tricky sewing) away from the edges of the pocket. I usually make my welt about a centimeter (half an inch) high.
I usually sew the entire rectangle. You can just sew the top and bottom lines, apparently that keeps the bulk down, but the entire rectangle usually keeps things even for my clumsy hands.
(Doing a velcro closure instead? Sew a rectangle of velcro to the paw piece, just above where the welt will go before you sew the welt on. Or after, if you can maneuver the fabric around and keep the pocket from getting caught.)
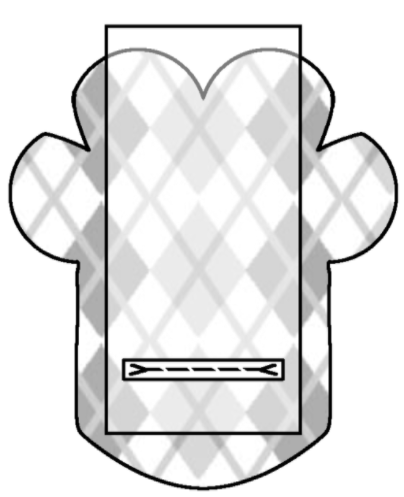
Cut the inside square. I usually cut the corners with a triangle notch shape and then take as much as I’m comfortable with from the rest of the inside. Try to leave a tiny bit: remember, you’re turning it out and pressing it and it has too small of a seam, it will tear.
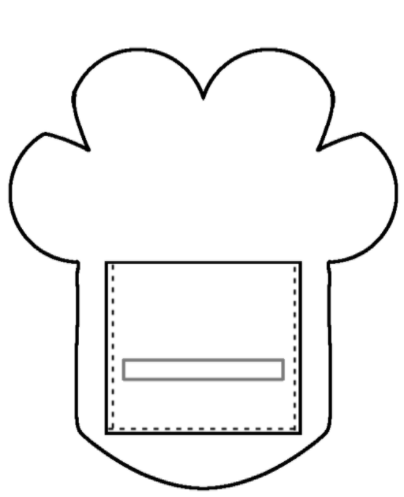
Flip and press (with iron or with your fingers). It’s a little weird, I know, but it should leave you with a nice clean rectangle in the end. Feel free to pin the pocket down to hold it in place.

Pin in your zipper! Pardon the image that implies the tabs are on the right side of the paws: they’re inside, I just messed up with layering. This will sew with right side of zipper to right side of pocket.
If you’re installing a flap, DO NOT SEW YET.
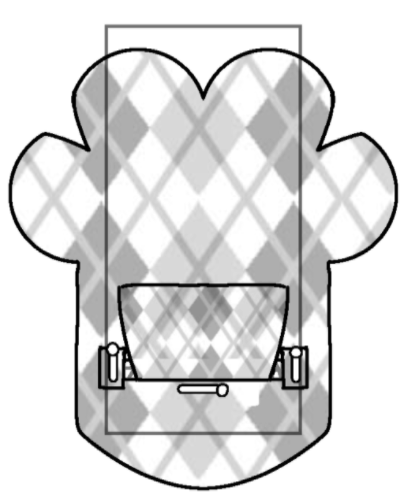
Unpin the wrist-side of the zipper and slide the flap in there. Adjust as desired. I usually put the flap facing towards the fingers, but you do you. Flip it as desired. Repin when done!

For clarity, all proceeding images will be shown with flap omitted. Mind the flap when sewing, so you don’t catch it on a side you need to open.
Sew along the welt. Mind the zipper and make sure you catch it! A zipper foot is really helpful here. Before you proceed to the next step, DOUBLE CHECK the zipper by opening and fiddling with it! Fixing openings is easier now.
(Doing a velcro closure? Sew the other side of the velcro onto the flap now. You’ll be able to position it best that way! It’s a little awkward, I know, but you’ve gotten this far. You’ve got it handled.)
Now for a tricky part: fold the pocket in half, putting the right-sides together. Pin in place.
I usually sew this in such a way that the stitches don’t show on the paw piece. That means folding the paw piece out of the way while you stitch as close to the edge of the pocket as you’re comfortable doing: I usually do about a 1/4th” seam.
Open the pocket via the zipper and fiddle around, making sure there’s no gaps or missed seams.
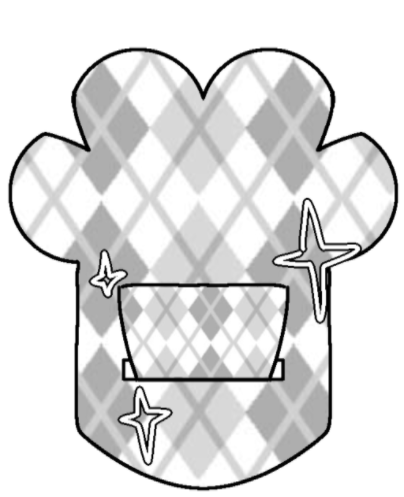
Look at what you made! It’s a pocket!
From here, you can finish the paw lining as described by your pattern. You want this piece facing towards the palm, where there won’t be as much stuffing in the finished piece.

Leave a comment